 Call us
 Email us
 Request a meeting
 Live chat
Maintaining your cordless vacuum
From washing the filter to clearing the brush bar, routine maintenance helps to keep your vacuum performing at maximum efficiency.

Fully-sealed advanced filtration
Five-layer filtration
All our cordless vacuums use at least five layers of advanced, whole-machine filtration to capture 99.97% of particles as small as 0.3 microns.¹
Every machine is tested to ensure it’s fully sealed, so it traps dust and dirt inside and expels cleaner air into your home.

Bin cyclone
Initial cyclonic separation removes the larger particles.

Powerful cyclones
Generate strong centrifugal forces to capture fine dust with no loss of suction.

Pre-motor filtration
Electrostatically charged filter attracts smaller particles that would otherwise pass through.

Metal mesh filter
Advanced chemical etching ensures the mesh sieves particles from the airflow.

Easy step-by-step guide on how to clean your vacuum filter
We engineer vacuums that are simple to use and easy to look after.
We suggest you clean your filter once a month to keep your machine running at maximum efficiency.
-
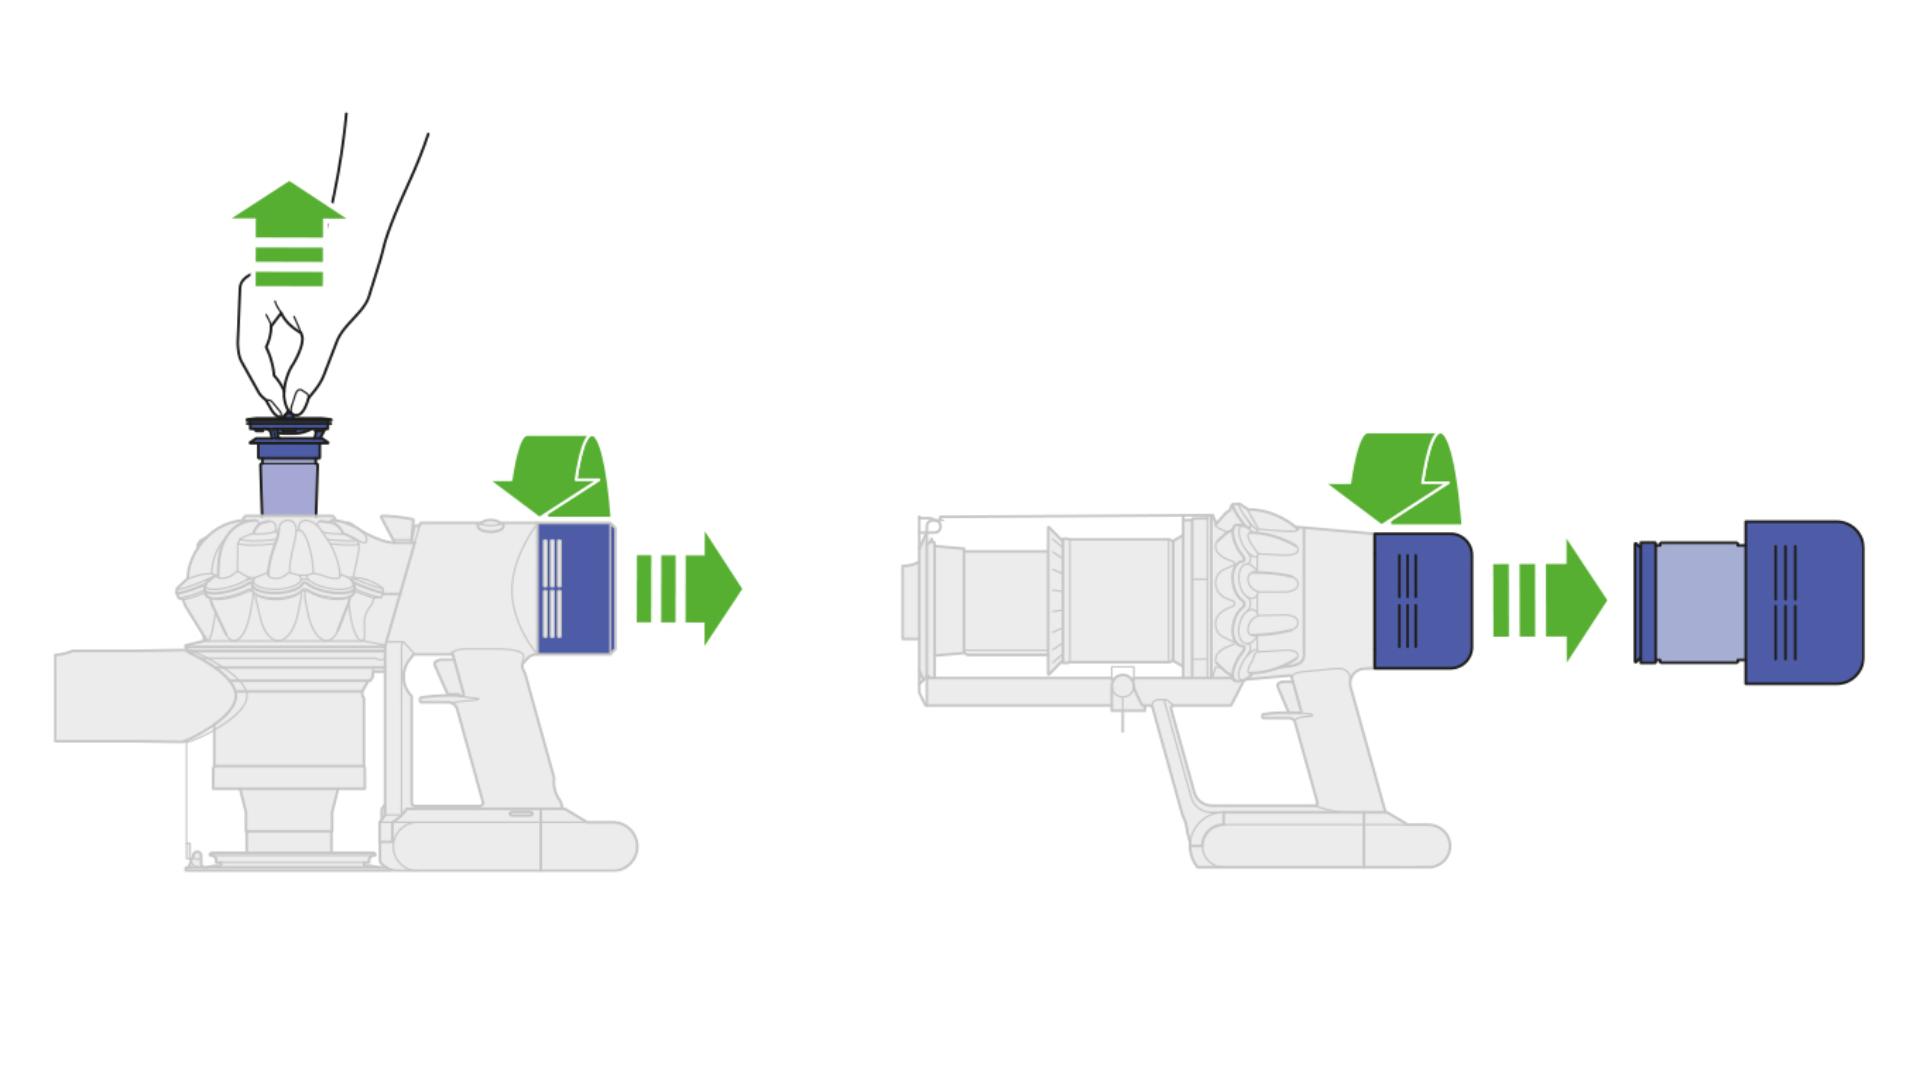
Remove your Dyson filter(s)
Remove your filter(s) from your Dyson machine. -
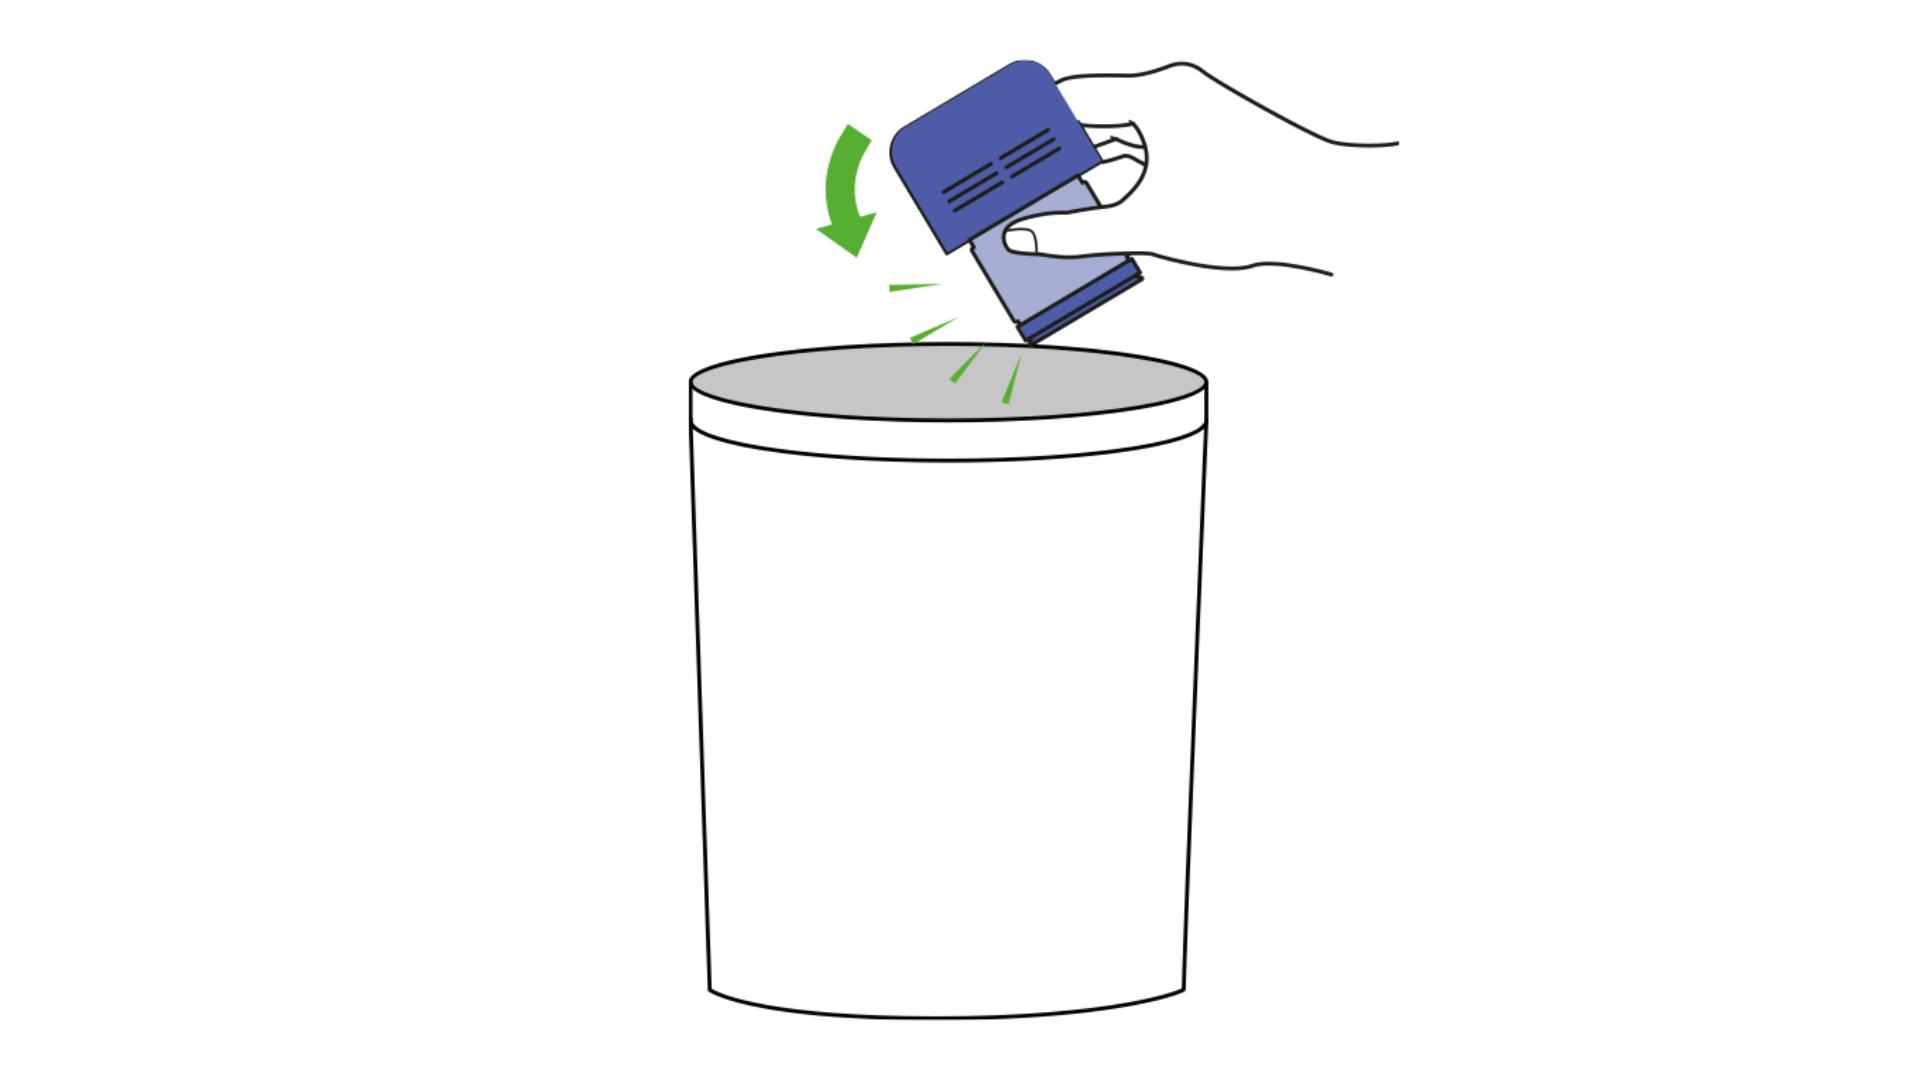
Remove excess dust
Tap your filter(s) lightly on the side of the sink or in the bin, to remove any loose dust and debris. -
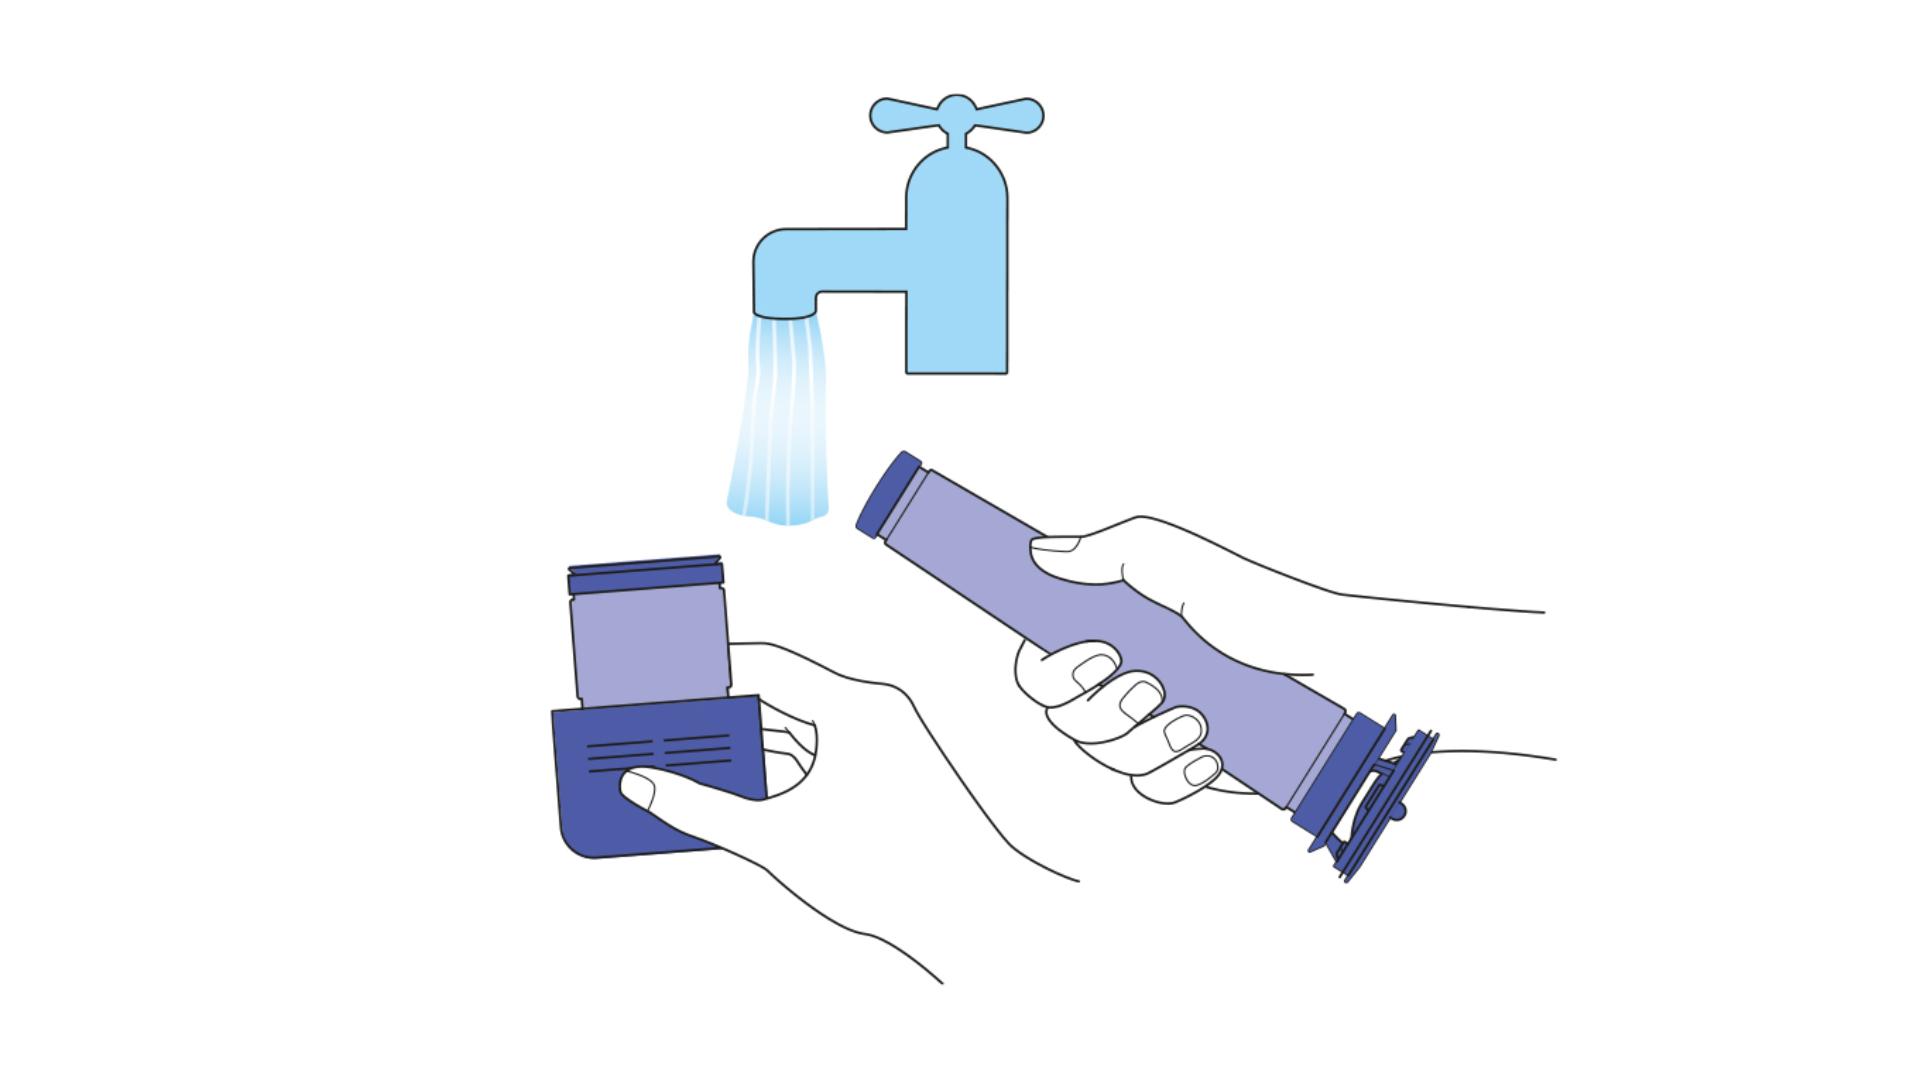
Rinse your filter(s)
Wash your filter with warm tap water – gently rubbing it with your hands.
Don't use detergents -
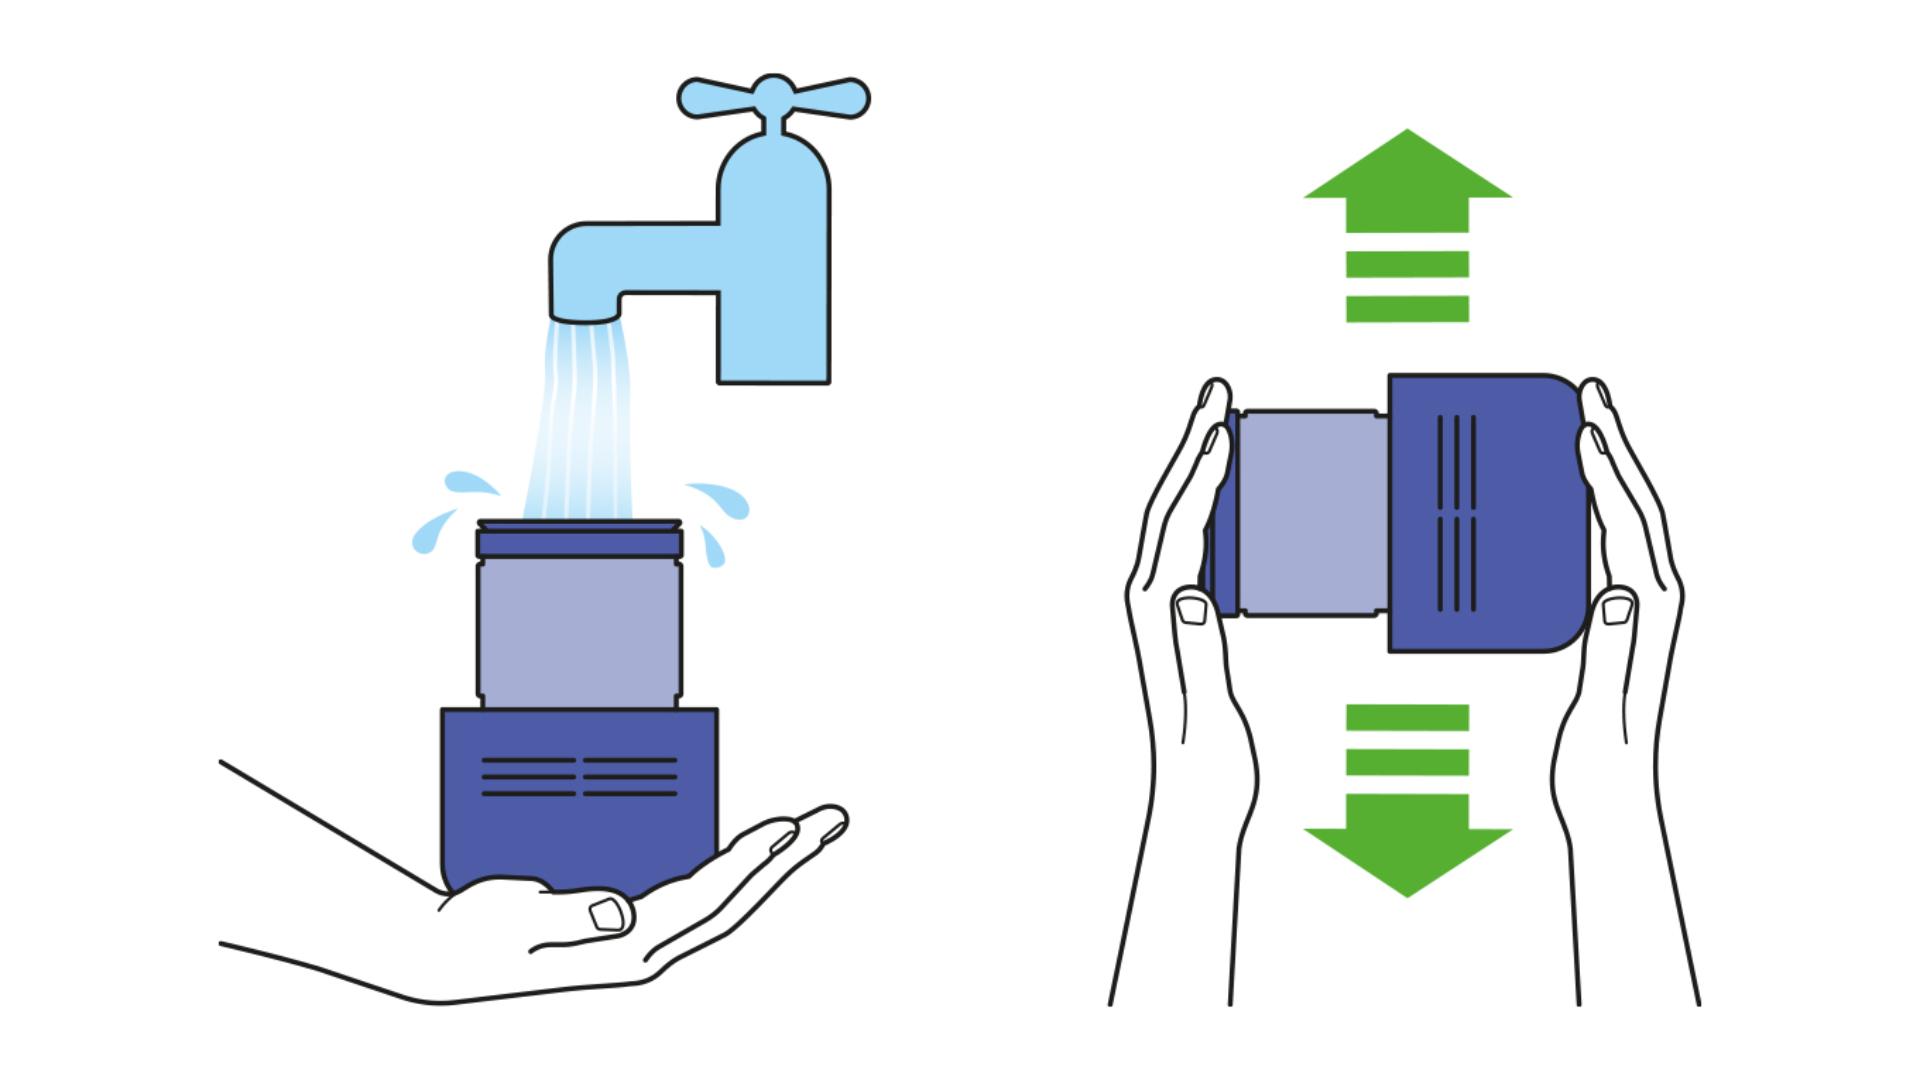
Give it a firm shake
Fill your filter(s) with warm tap water. Cover the open ends with your hands and shake firmly to remove the dirt. Repeat until the water runs clear and then firmly shake the filter to remove all excess water. -
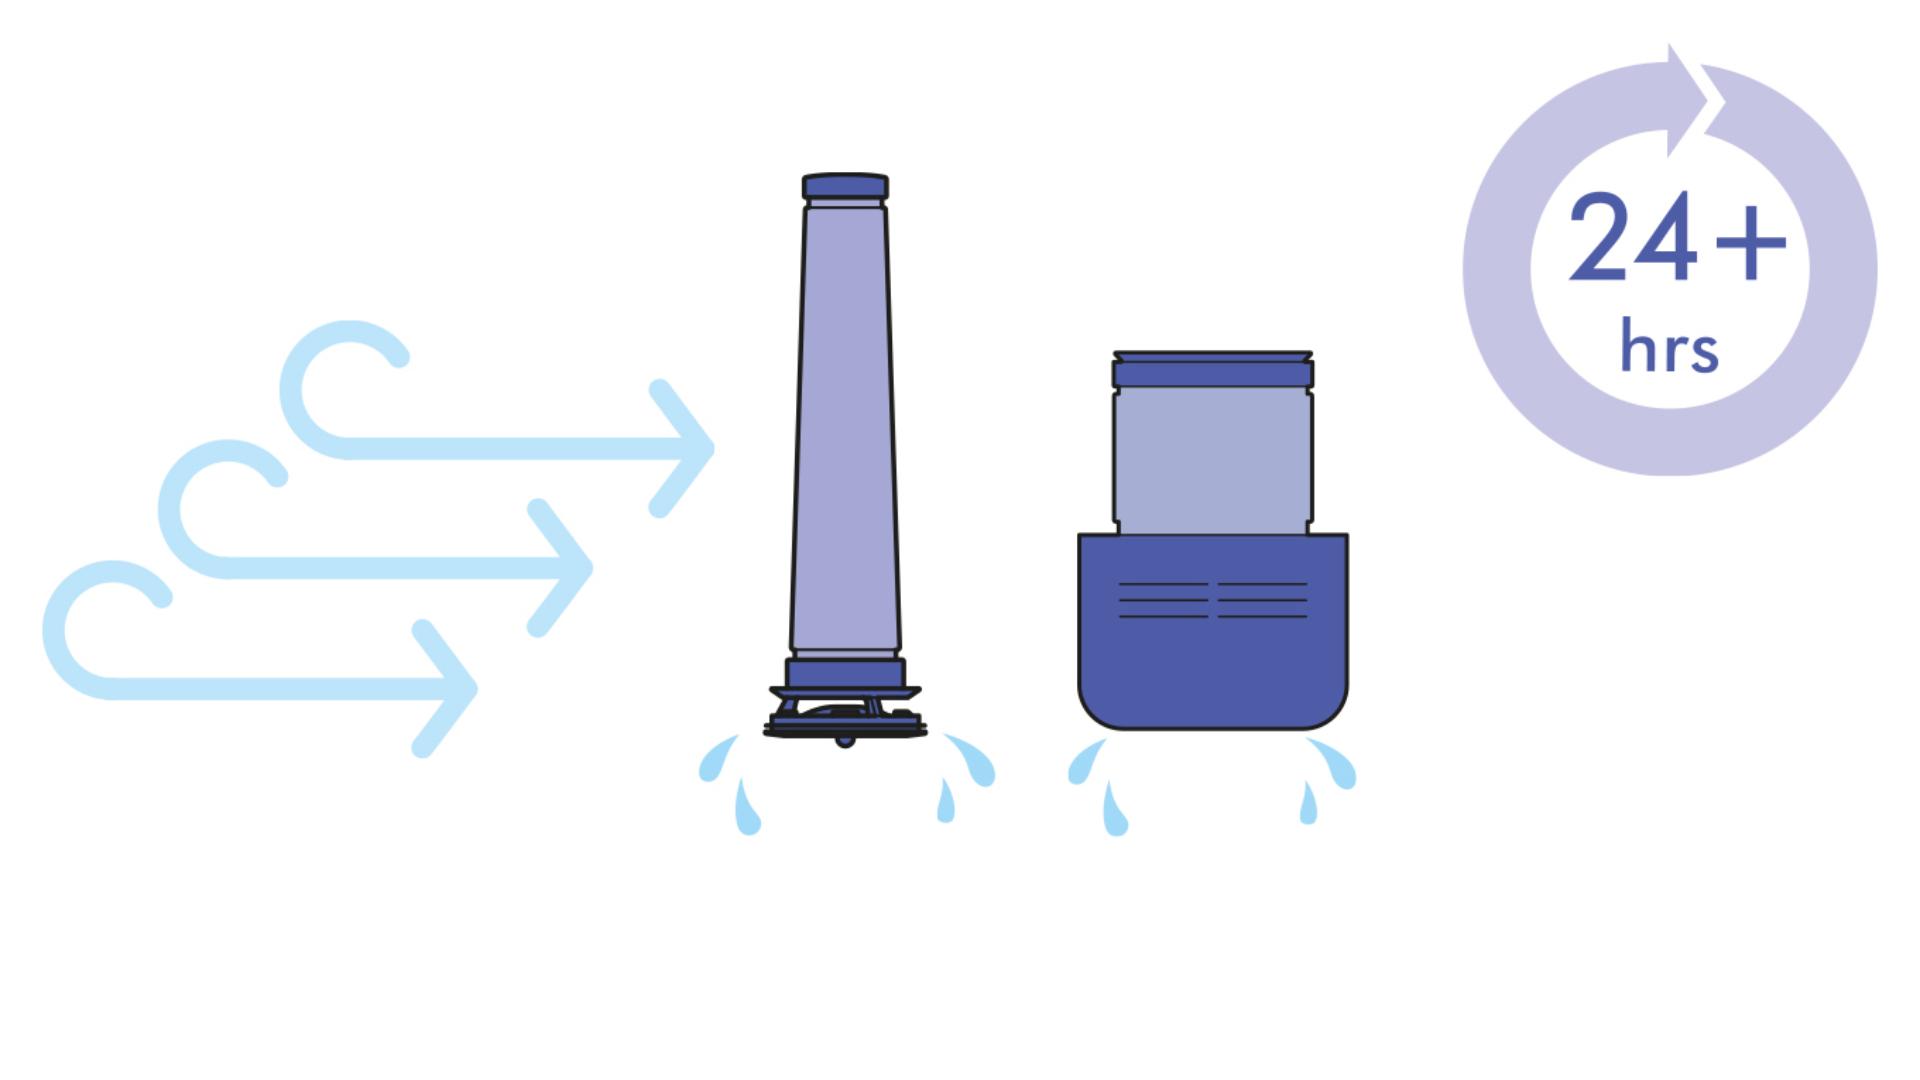
Leave to dry for 24+ hours
After washing your filter(s), leave to dry for at least 24 hours in an area with plenty of airflow, such as beside a fan or open window. Your filter(s) must be completely dry before you put it back into the machine, or it could damage the motor.
Don't dry in a tumble dryer, microwave or near a naked flame. -


Watch the video for filter cleaning tips
Select your machine from the list below to see how to clean your specific vacuum filter.
-
V11 vacuums
-
V10 vacuums
-
V8 vacuums
-
V7 vacuums
-
V6 vacuums
-
V11 and V10 vacuums
How to empty and clean the bin on your Dyson V11™ or V10™ vacuum
Step 1: Remove the wand
Press the red release button to remove the wand from the bin.
Step 2: Empty the bin
Hold the machine with the bin in a downwards position and firmly push the release lever.
Step 3: Remove the bin
Press the red button located on the bin runner and slide the bin down to disconnect.
Step 4: Wipe excess dust
Using a damp cloth only, wipe away any dust.
Step 5: Dry completely
Ensure that the clear bin and seals are completely dry before replacing.
Step 6: Refit the bin
Insert the spine into the bin runner. Then close the lid and make sure the bin and base click into place.
V8 and V7 vacuums
How to empty and clean the bin on your Dyson V8™ or V7™ vacuum
Step 1: Remove the wand
Press the red release button to remove the wand from the bin.
Step 2: Empty the bin
Pull the red lever upwards to release the cyclone. Continue until the bin base opens to release the dirt.
Step 3: Remove the cyclone
Push in the red button located behind the cyclone and lift the cyclone out.
Step 4: Remove the bin
Pull back on the red catch located at the base, slide the clear bin down and carefully remove forwards from the main body.
Step 5: Clean the bin
Using a damp cloth only, wipe away any dust. Ensure that the clear bin and seals are completely dry before replacing.
Step 6: Refit the bin and cyclone
Align the tabs on the clear bin with the grooves on the main body, slide upwards until the catch clicks. Slide the cyclone into the grooves of the main body until it's in a normal position. Close the base, making sure it clicks shut.
V6 vacuums
How to empty and clean the bin on your Dyson V6™ vacuum
Step 1: Remove the wand
Press the release button to remove the wand from the bin.
Step 2: Empty the bin
Press the red bin releae catch to open the bin base.
Step 3: Remove the bin
Press the catch a second time to release the bin from the cyclone.
Step 4: Clean the bin
Using a damp cloth only, wipe away any dust. Ensure that the clear bin and seals are completely dry before replacing.
Step 5: Refit the bin
Locate the tab on the front of the cyclone with the recess in the bin inlet. Close the bin base, ensuring it clicks shut.
V11 vacuums
See how to do it in our step-by-step video guide.
Step 1: Remove the end cap
Using a coin, undo the end cap fastener by rotating anti-clockwise. Lift the end cap and remove.
Step 2: Remove the brush bars
Remove the main brush bar, then lift out the rear brush bar.
Step 3: Wash the brush bars
Wash both brush bars with cold water. Then remove as much excess water as possible.
Step 4: Dry completely
Stand the brush bars upright and leave to dry for at least 24 hours, until completely dry.
Step 5: Replace the brush bars
Firstly replace the rear brush bar, followed by the main brush bar.
Step 6: Replace the end cap
Using a coin, lock the end cap fastener by rotating clockwise.
V10 and V8 vacuums
See how to do it in our step-by-step video guide.
Step 1: Remove the end cap
Using a coin, undo the end cap fastener by rotating anti-clockwise. Lift the end cap and remove.
Step 2: Remove the brush bars
Remove the main brush bar, then lift out the rear brush bar.
Step 3: Wash the brush bars
Wash both brush bars with cold water. Then remove as much excess water as possible.
Step 4: Dry completely
Stand the brush bars upright and leave to dry for at least 24 hours, until completely dry.
Step 5: Replace the brush bars
Firstly replace the rear brush bar, followed by the main brush bar.
Step 6: Replace the end cap
Using a coin, lock the end cap fastener by rotating clockwise.
How to detangle your Brush bars
Clearing wrapped hair and fibres relieves unnecessary strain on your machine’s motor – restoring full power.
V11 and V10 vacuums
How to detangle the brush bar on your V11™ or V10™ vacuum
Step 1: Remove the brush bar
Using a coin, undo the end cap by rotating anti-clockwise and remove the brush bar.
Step 2: Remove debris
Make sure the spindle is free of debris, then remove debris from the brush bar. Take off the end cap and remove any further debris.
Step 3: Replace brush bar
Refit the end cap and replace the brush bar in the cleraner head. Using a coin, secure the end cap by rotating clockwise.
V8 and V7 vacuums
How to detangle the brush bar on your V8™ or V7™ vacuum
Step 1: Remove the brush bar
Using a coin, undo the end cap by rotating anti-clockwise and remove the brush bar.
Step 2: Remove debris
Make sure the brush bar is clear of debris.
Step 3: Replace brush bar
Replace the brush bar in the cleraner head. Using a coin, secure the end cap by rotating clockwise.
Tools and accessories
Genuine Dyson tools and accessories for your machine

More support
-

Guides and helpful tipsHow to get your Dyson machine working to its full potential.
See all guides and tips

1 Tested against ASTM F1977-04 (particles sized 0.3-0.5 microns), tested in Boost mode.